Installation
Installation based on Anaconda
You are recommended to create a new Conda environment to
install the mtldp
Create new conda environment
conda create -n $env_name$ python=3.8
conda activate $env_name$
Install
mtldp, since we still keep updating this package, the development is recommended:
pip install e .
Third-party dependencies
Some third-party dependencies cannot be easily installed simply
through the pip command lines. You need to install them to your
conda environment dependently:
osmnx: run the following command lines
conda config --prepend channels conda-forge
conda install --strict-channel-priority osmnx
Fast-Map-Matching: see the following subsection.
Installation of the fmm
The implementation of the map matching is based on a thrid-party package called fast map matching [git][wiki]. To install this package, you are recommended to use the Ubuntu system where the installation documentation can be found at the wiki page. However, the installation instruction of the Windows system does not work well.
Here is an documenation showing you how to install the fmm in the Windows system. The following installation is tested on Windows 10 x64 system with x64 Anaconda virtual environment. This installation is quite complicated, prepare yourself for a couple of hours and please read every comments and attentions carefully. Good luck!
Preparation
The installation is based on Anaconda, you are supposed to install Anaconda first and create a new virtual environment by using:
conda create -n $env_name$ python=3.8
conda activate $env_name$
If not specified, we recommend you to run the command lines in
Anaconda Prompt.
Download and install
Build Tools for Visual Studio[download link][official-website] by selecting the download option: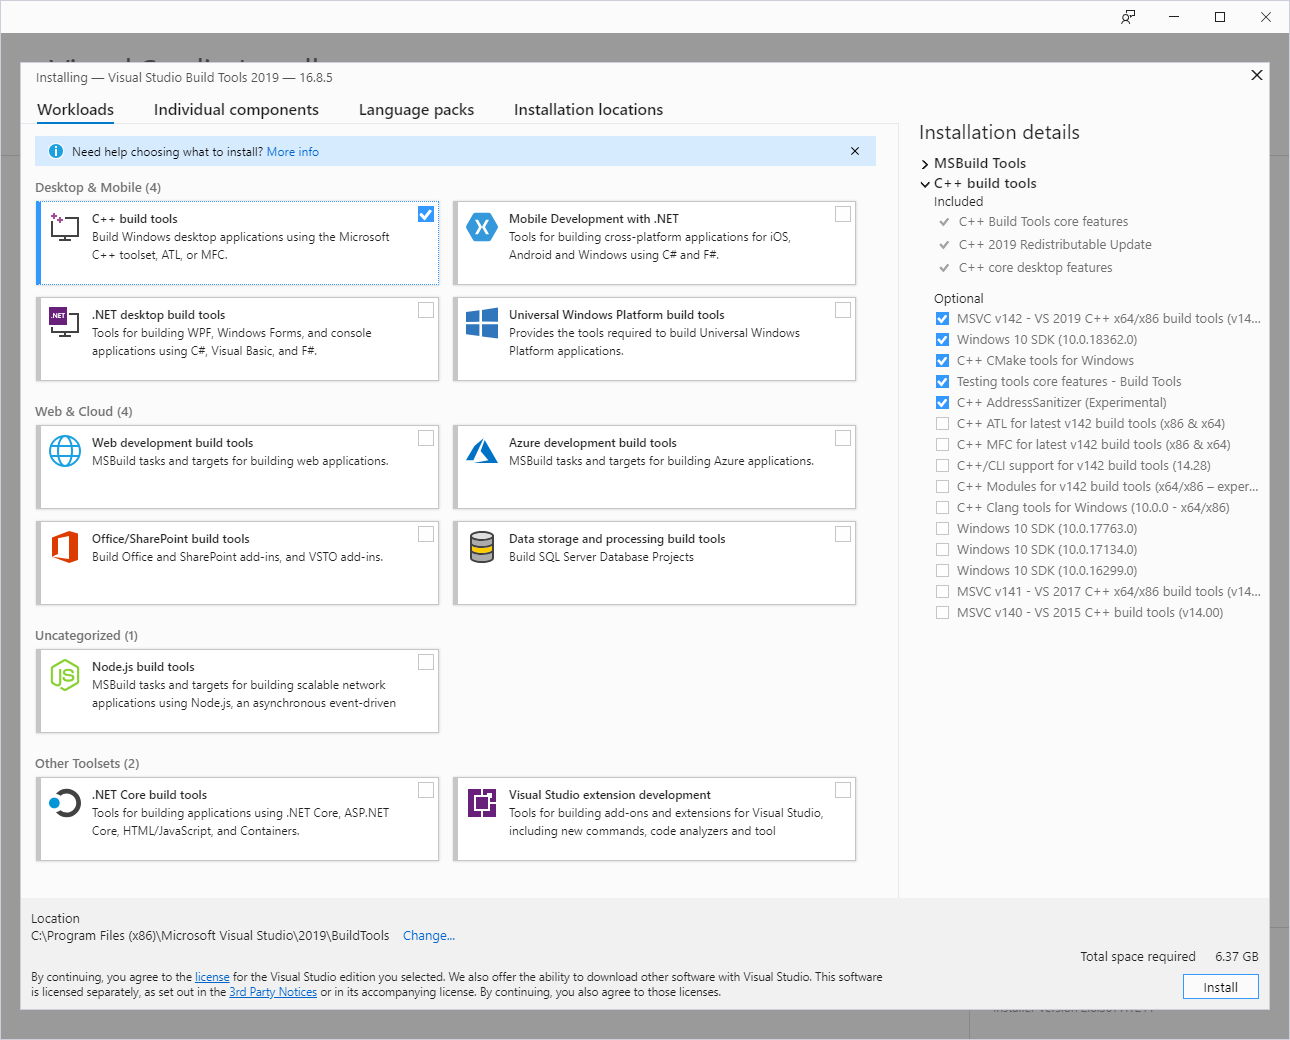
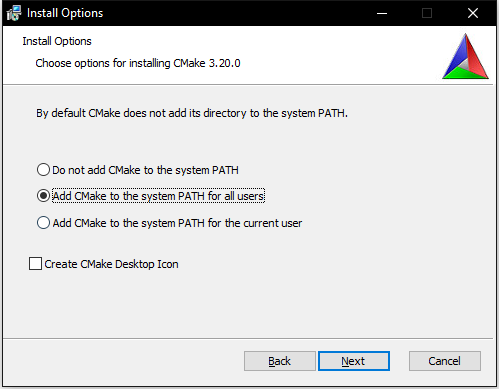
Download and install
CMake[link] and add it to system path:
git clone https://github.com/microsoft/vcpkg
cd vcpkg
bootstrap-vcpkg.bat
Install dependencies using vcpkg (within the path of
vcpkg):
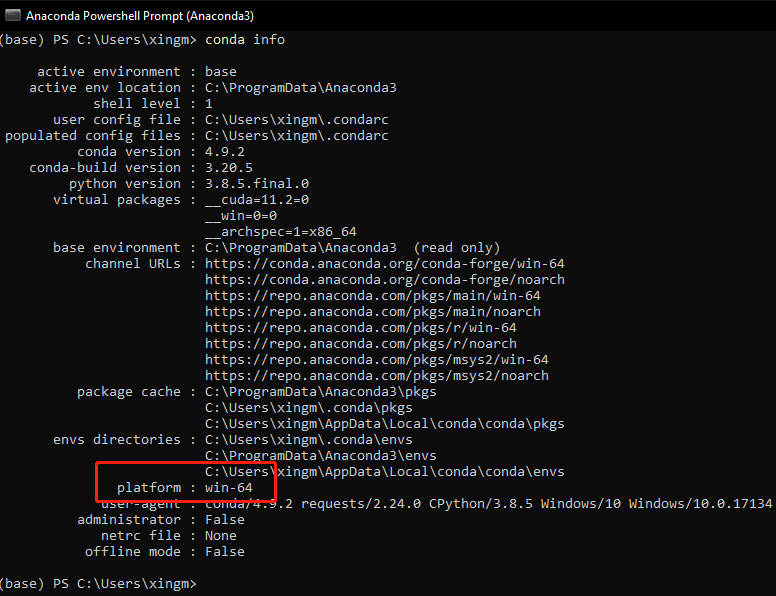
vcpkg install gdal boost-geometry boost-graph boost-serialization --triplet=x64-windows
triplet=x64-windowsshould be consistent with your anaconda platform version. Please check the installed anaconda platform version by using cmdconda info:
Installation
Clone the FMM repo:
git clone https://github.com/cyang-kth/fmm
Please check PR [here] for an error you might encounter durnig the compile process. Probably you will need to change the file in
python/CMakeLists.txtaccording to the pull request or you can directly pull the forked version in https://github.com/cmpute/fmm/tree/patch-1 (use this branch).
CMake (in the path of
fmm):
Attention: you should use the
Native Tools Command Promptfor VS that has the consistent platform version (x86 or x64).

mkdir build
cd build
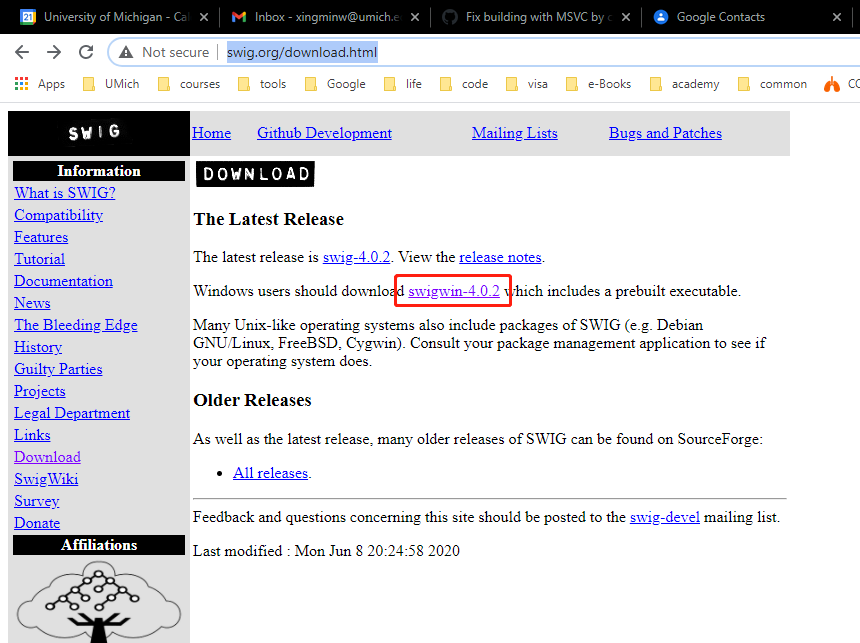
cmake .. -DCMAKE_TOOLCHAIN_FILE=$vcpkg_path$/scripts/buildsystems/vcpkg.cmake -DSWIG_EXECUTABLE=$swigwin_path$/swig.exe -DCONDA_PREFIX=$anaconda_path$/envs/$env_name$ -DCMAKE_INSTALL_PREFIX=$anaconda_path$/envs/$env_name$ -G "NMake Makefiles"
nmake install
Please pay attention to the path in the
cmakecommand line; you need to carefully set the paths correctly one by one. Here is an example I used:
cmake .. -DCMAKE_TOOLCHAIN_FILE=F:/vcpkg/scripts/buildsystems/vcpkg.cmake -DSWIG_EXECUTABLE=F:/swigwin-4.0.2/swig.exe -DCONDA_PREFIX=C:/Users/xingm/.conda/envs/mtldp -DCMAKE_INSTALL_PREFIX=C:/Users/xingm/.conda/envs/mtldp -G "NMake Makefiles"
(To be fixed in the future) move all the
*.dllfiles in thebuildfolder to$anaconda_path$/envs/$env_name$/bin(example in my desktop:C:/Users/xingm/.conda/envs/mtldp/bin).